


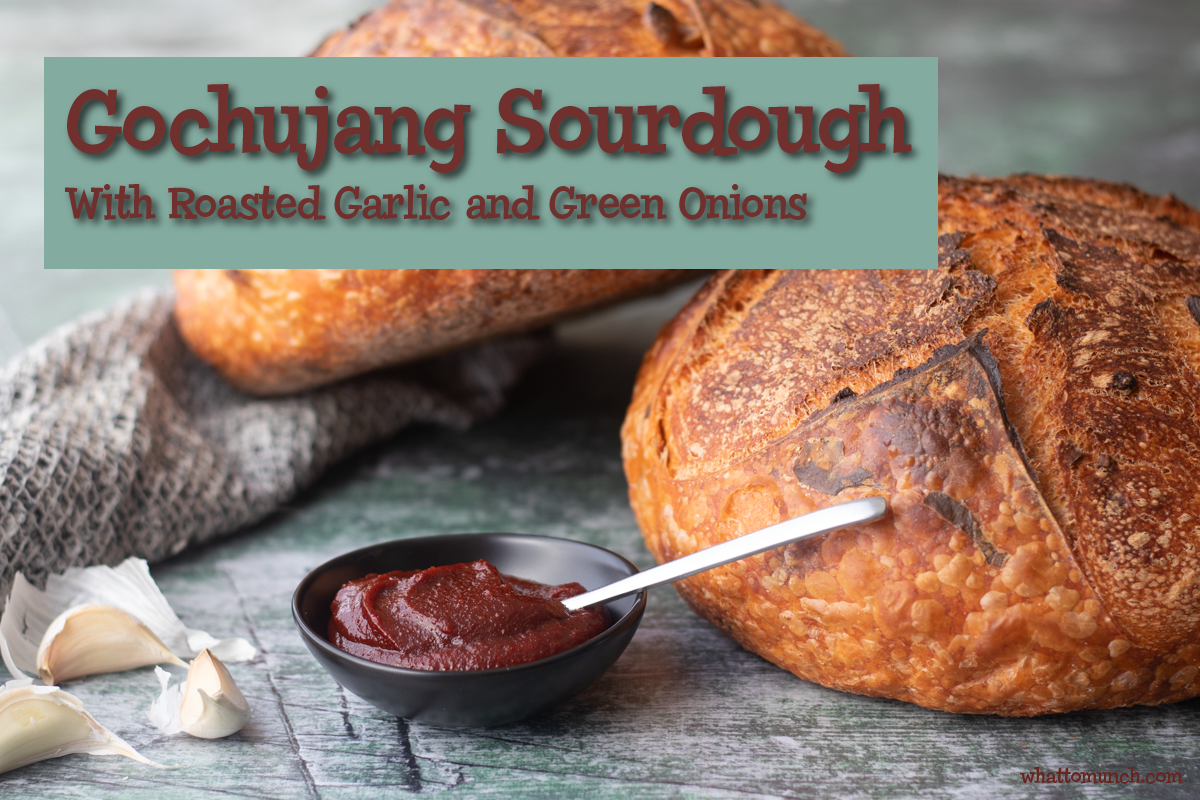
Gochujang Sourdough with Roasted Garlic and Green Onions is an adventure in every bite of this amazing loaf of bread.

Gochujang Sourdough with Roasted Garlic and Green Onions may be the most incredible sourdough bread I have ever made. This combination of Gochujang, fragrant whole roasted garlic cloves, and sharp green onions is an explosion of umami in your mouth. I will confess this idea is not my own. It’s from a bakery with a YouTube channel called Proof Bread, from an artisan bakery in Mesa, Arizona. It came across my feed one day, and of course, I had to watch the whole video. My mouth started to water, and I began to figure out my own version.

As many of you know, I am a huge fan of Gochujang, so this recipe was a no-brainer to play with. I think I have come up with a brilliant version of this intensely flavored bread. The Gochujang adds just the right amount of spice, and the garlic and green onions complete the flavors to make this one delicious bread. This is a recipe for the more advanced sourdough baker, as there are many steps. However, all the effort will produce a couple of incredible loaves of gochujang sourdough bread. My whole house smells of garlic and gochujang in the best possible way. I gave a loaf of this tasty bread to my good friends and got rave reviews. Not only is this Gochujang sourdough bread great on its own, but it is also incredible as sandwich bread and the perfect base for avocado toast. Believe me, it will change your world.

If you have never had Gochujang before, this Korean Chili paste bursts with an umami flavor that will make your mouth sing. Think of Gochujang as the Korean Sriracha. It is used in many Korean dishes, especially Korean fried chicken in their fantastic BBQ sauce. I have made these Korean BBQ ribs in this post here that are still my go-to rib recipe. It is even incredible mixed with some mayo for a crazy dipping sauce for French fries. Gochujang can be found at many grocery stores or here on Amazon. (I get a small commission for any purchases through the links on my blog at no cost to you. Please consider helping fund my blog.) A little tub of this additive stuff will last for a couple of months or more in the fridge and is well worth having to add flavor to many dishes.

The Bakery in Mesa folded in the Gochujang later in the folding process than I have done. I found it easier to get the chili paste to blend in and more distributed if I mixed it in in the beginning. But I tried to mimic the amounts as close as I could. This is a high hydration dough that can be tricky, as the chili paste and the other mix-ins add even more moisture. I cut back on the salt, too, since Gochujang is quite salty on its own. I really hope you give this Gochujang Sourdough a try. It is worth every bit of the effort. Please do not hesitate to contact me with any questions down in the comments below.

Let’s all be mindful of others and think about our actions and desires for things to be back to normal before making decisions. What we choose to do now will make getting back to normal easier. We are almost there, if we just can all hang on. Use patience, be safe and healthy. That’s all for this week. I hope you have a fantastic day. I’ll be back at it next week!

- 300 grams all-purpose flour
- 700 grams bread flour
- 750 grams water
- 170 grams peeled garlic cloves or 6 oz
- 4 tablespoons olive oil
- 150 grams active sourdough starter
- 15 grams of sea salt
- 160 grams Gochujang or Korean Chili Paste.
- 1 cup sliced green onions about 1 bunch
-
The night before or in the early morning or about 6 – 8 hours before you want to start the dough process, feed your sourdough starter and let it sit in a cool place.
-
Simultaneously, mix together in a very large bowl or plastic tub, the all-purpose and the bread flours. Add the water and mix it until moistened. It doesn't have to be perfect, just well mixed, to let the water and the flours become friends. Do not use a metal container. Sourdough reacts with some metals and gives off a metallic taste.
-
Cover with plastic wrap and let sit out while your starter gets ready for the party. Note: This is called autolyze and will help develop some incredible flavor and develop some of the gluten. In a pinch, the flour and water could be mixed together just before mixing the dough if you forgot. But it won't have as much depth to the flavor.
-
Sometime during the feeding process or even the night before; roast the garlic:
-
Preheat the oven to 325°.
-
Place the peeled garlic cloves into a small baking dish.
-
Mix in the olive oil, stirring to make sure all the cloves have been coated in oil.
-
Cover the baking dish with foil.
-
Place in the oven and roast for about 1 ½ hours, or until the cloves have turned golden and they are soft or easily pierced with a fork.
-
Let cool in the oil until room temperature.
-
Drain the garlic cloves and reserve the now flavored oil for another purpose.
-
Making the Dough
-
When your starter has doubled or more and is bubbly, the starter is ready for action. It may look like it has fallen in on itself. That is ok, too. Another way to test to see if your starter is ready is if a tablespoon or so dropped into some water floats. Measure out 150 grams of the starter and add it to the flour mixture. Don't forget to feed your starter again for the next time.
-
Using your hands, really get in there and mix it to thoroughly combine, working the dough well to make sure the starter has been thoroughly mixed into the dough.
-
Sprinkle the sea salt over the rough dough and add the gochujang. With your hands again, really get into the dough, squeezing with your fingers and pulling and stretching until you can feel the salt crystals have dissolved and the chili paste has been mixed in well. It doesn't have to be perfect. This may take a couple of minutes. You do not need to actually knead the dough; just make sure it has been thoroughly mixed. When you feel the dough has been well mixed, pull and stretch the dough, grabbing one edge and pushing down towards a farther edge. Begin to form a mass, continuing in a circle until you have made a rough ball of dough.
-
Scrape down the sides of whatever container you are using and cover with a lid or plastic wrap.
-
Let rest for 30 minutes or so. You can extend this to 45 to 50 if your schedule needs it.
-
Uncover the bowl and grasp one edge of the rested dough. Wet your hands to prevent the dough from sticking. I like to keep a bowl or measuring cup of water next to the rising dough to do this. Pull up and stretch out the ragged mass of dough several inches above the surface. Bring the dough over onto itself and push it down towards the further edge. Turn the bowl ¼ and repeat, stretching the dough again. Continue this until you have come full circle. The dough should have gathered into a rough ball again.
-
Cover again and let rest for another 30-45 minutes.
-
Repeat the folding process. Each time the dough ball starts out looking very flat and loose. It will tighten more and more after each fold. The final time the ball of dough will look very smooth, and the dough will have a lot of elasticity. It will gather into a nice tight ball.
-
After the second fold, add the green onions and the drained roasted garlic. Stretching and folding as before, continue until they have started to disperse throughout the dough. You will have one more fold after this to fully incorporate the mix-ins.
-
Let the dough rest for an additional 30 minutes and repeat the pulling and stretching one more time.
-
Let the dough rest and rise until more than doubled with large bubbles very visible. It will take 5-8 hours in total from the first mix with the starter.
-
Line two rising baskets or medium bowls with cotton tea towels.
-
Scrape the bread dough onto a floured work surface. Divide the dough into 2 equal pieces. Roughly gather them each into a ball and let rest for 10 – 15 minutes.
-
Using a dough scraper in one hand and coating your other hand lightly in flour, pull one of the rough dough balls towards you onto a clean surface area. Using the tension and a slightly circular motion, continue to turn the ball until it forms into a tight ball. You should see bubbles underneath the surface.
-
Place ball of dough seam side up into the cloth-lined basket or bowl. Pinch together the dough if there are any rough surfaces.
-
Repeat with the second ball of dough.
-
Wrap each filled basket with plastic wrap.
-
Let sit in the refrigerator for 24-48 hours. I have found the best for sour flavor is in the 36-hour area. But it all depends on your needs and timing. To get the fantastic blisters, it needs to retard for at least 24 hours or longer.
-
About 1 hour before you want to bake, place 2 Dutch ovens in a cold oven with the lid askew. Preheat the oven to 450° and let the Dutch ovens heat for one full hour.
-
Pull the loaves out of the fridge when you are ready to bake.
-
Cut 2 parchment paper rounds approximately 12 inches across. Thoroughly crumple and wet under a running faucet. Place one crumpled parchment round down on a work surface and smooth it out. But keep it wet.
-
Using oven mitts, carefully remove one of the Dutch ovens and place it on a trivet or a heatproof surface.
-
Unmold one of the loaves onto the center of the one wet parchment paper circle.
-
Quickly slash the loaf in a crosshatch or simple design on the top.
-
Lift the slashed loaf by the parchment paper and carefully place it into the hot Dutch oven. Using an oven mitt, immediately place the hot lid onto the filled Dutch oven and put it into the hot oven. Be careful; the Dutch oven is scorching. Make sure to use an oven mitt.
-
Quickly repeat with the second loaf.
-
Bake covered in the oven for 20 minutes.
-
Uncover the Dutch ovens and bake for an additional 20 – 25 minutes. The bread should be deeply golden and sound hollow when tapped. Unmold onto a rack and remove the parchment paper.
-
Let cool completely before slicing. If you can wait that long, it will slice easier.


4 thoughts on “Gochujang Sourdough with Roasted Garlic and Green Onions”
Wow. Thanks so much! I was a bit nervous about making this (my son suggested it after viewing the video). I was so pleased to find your interpretation of the video recipe! Note that I used my “Easy-New Process” recipe, and simply added the Gochujang paste as the same time as the salt, and the garlic and green onions about a half hour later, and then just continued as usual. It turned out FANTASTIC! (And it was actually pretty easy!)
I’m so glad you liked the recipe. I have made it several times and given out loaves to friends too. It makes incredible sandwiches too!
David
Thank you SO MUCH for this recipe. I was thinking I’d have to create one after seeing the Proof Bakery video. It looked so good but I’m not looking to make 100 loaves of bread. I even halved your recipe to make 1 boule. It worked perfectly! I’ll have to resist the urge to just tear off pieces and eating it like a heathen lol
Yay! This recipe is really a great one. I’ve made it several times now and it is so addictive. My Brother has requested I make many more loves!
Thanks so much for the compliment. Enjoy
David
Comments are closed.